
Easy Login Page in Android Studio using Kotlin – 5 Steps Only!
Table of Contents
- What is Login Page?
- Pre-requisite Color
- Download Login Background Image
- Step-by-Step Implementation:
- Output
- AK Bonus Points
What is Login Page?
The login page is used for authentication purposes in the applications. We required a firstly sign-up page where users will register themselves and will be able to log in further using a username and password
In this project, we have created a simple login page in the android studio where the authentication purpose is static, meaning the username and password will already be set in the code. With the same set of usernames and passwords, the user has to log in.
Pre-requisite Color
Please find the brand color as #8692f7 (Purple)
Add the color in the colors.xml file as given:
<color name="purple">#8692f7</color>
Download Login Background Image
Download the login background image for free:

Step-by-Step Implementation:
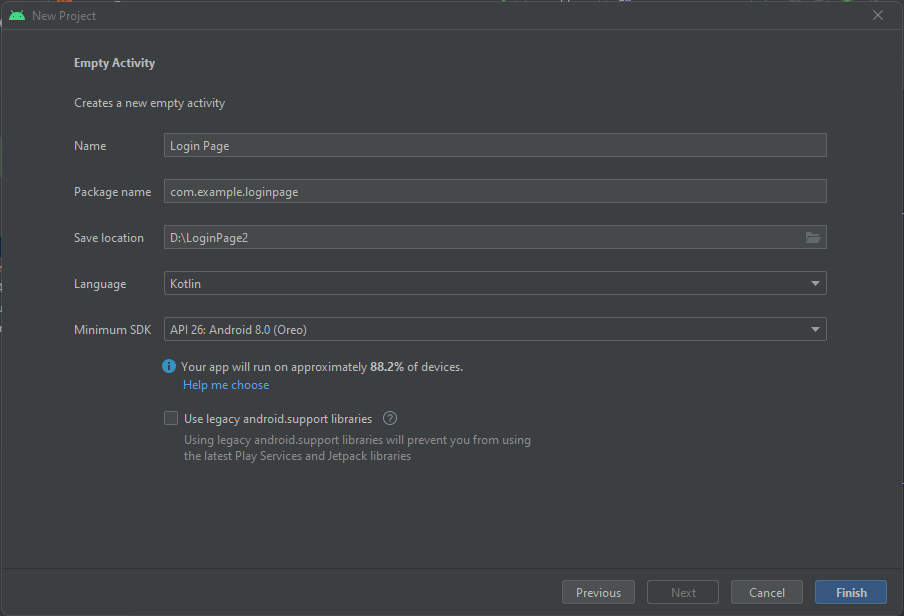
Step 1: Open Android Studio, Create New Project and Choose Empty Activity. Click Finish.
Step 2: Add Color under folder res ->values->colors.xml
You can use any color according to your app requirements, I have used our brand color #8692f7.
<color name="purple">#8692f7</color>
Step 3: Create custom_edittext.xml
Right-click on the drawable folder under the res folder then click on New -> Drawable Resource File
The round corners are 30dp, you can customize them as per your requirements.
Add two vector assets, the person icon and lock icon, and give the background tint as #8692f7 color.
Type the below code:
<?xml version="1.0" encoding="utf-8"?>
<shape xmlns:android="http://schemas.android.com/apk/res/android"
    android:shape="rectangle">

    <stroke
        android:width="2dp"
        android:color="@color/lavender"/>

    <corners
        android:radius="30dp"/>

</shape>
Step 4: Type the below code in activity_main.xml
We have created a minimal and beautiful design for the login page in android studio.
We have used Linear Layout in which a CardView is present and then two EditText and one Button.
To give it a style, we have added the CardView background as custom_edittext.xml which will provide round corners with purple color.
<?xml version="1.0" encoding="utf-8"?>
<LinearLayout
    xmlns:android="http://schemas.android.com/apk/res/android"
    xmlns:app="http://schemas.android.com/apk/res-auto"
    xmlns:tools="http://schemas.android.com/tools"
    android:layout_width="match_parent"
    android:layout_height="match_parent"
    android:orientation="vertical"
    android:gravity="center"
    android:background="@drawable/loginbkg"
    tools:context=".MainActivity">

    <androidx.cardview.widget.CardView
        android:layout_width="match_parent"
        android:layout_height="wrap_content"
        android:layout_margin="30dp"
        app:cardCornerRadius="30dp"
        app:cardElevation="20dp">

        <LinearLayout
            android:layout_width="match_parent"
            android:layout_height="wrap_content"
            android:orientation="vertical"
            android:layout_gravity="center_horizontal"
            android:padding="24dp"
            android:background="@drawable/custom_edittext">

            <TextView
                android:layout_width="match_parent"
                android:layout_height="wrap_content"
                android:text="Login"
                android:id="@+id/loginText"
                android:textSize="36sp"
                android:textAlignment="center"
                android:textStyle="bold"
                android:textColor="@color/lavender"/>

            <EditText
                android:layout_width="match_parent"
                android:layout_height="50dp"
                android:id="@+id/username"
                android:background="@drawable/custom_edittext"
                android:layout_marginTop="40dp"
                android:padding="8dp"
                android:hint="Username"
                android:drawableLeft="@drawable/ic_baseline_person_24"
                android:textColor="@color/black"
                android:drawablePadding="8dp"/>

            <EditText
                android:layout_width="match_parent"
                android:layout_height="50dp"
                android:id="@+id/password"
                android:background="@drawable/custom_edittext"
                android:layout_marginTop="20dp"
                android:inputType="textPassword"
                android:padding="8dp"
                android:hint="Password"
                android:drawableLeft="@drawable/ic_baseline_lock_24"
                android:textColor="@color/black"
                android:drawablePadding="8dp"/>

            <Button
                android:layout_width="match_parent"
                android:layout_height="60dp"
                android:text="Login"
                android:id="@+id/loginButton"
                android:textSize="18sp"
                android:layout_marginTop="30dp"
                android:backgroundTint="@color/lavender"
                app:cornerRadius = "20dp"/>


        </LinearLayout>

    </androidx.cardview.widget.CardView>


</LinearLayout>
Step 5: Type the below code in MainActivity.java
There is a button named as loginButton on which we have set an onClickListener and in that, we have written the below logic.
We have set the username as “user” and the password as “1234”, so if the string matches with the user’s string then the toast will be shown as Login Successful but if the user’s string does not match with the static string then the toast will be shown as “Login Failed!”.
package com.example.loginpage

import androidx.appcompat.app.AppCompatActivity
import android.os.Bundle
import android.view.View
import android.widget.Button
import android.widget.EditText
import android.widget.Toast
import com.example.loginpage.databinding.ActivityMainBinding

class MainActivity : AppCompatActivity() {

    private lateinit var binding: ActivityMainBinding

    lateinit var username : EditText
    lateinit var password: EditText
    lateinit var loginButton: Button

    override fun onCreate(savedInstanceState: Bundle?) {
        super.onCreate(savedInstanceState)

        binding = ActivityMainBinding.inflate(layoutInflater)
        setContentView(binding.root)

        binding.loginButton.setOnClickListener(View.OnClickListener {
            if (binding.username.text.toString() == "user" && binding.password.text.toString() == "1234"){
                Toast.makeText(this, "Login Successful!", Toast.LENGTH_SHORT).show()
            } else {
                Toast.makeText(this, "Login Failed!", Toast.LENGTH_SHORT).show()
            }
        })
    }
}
Output
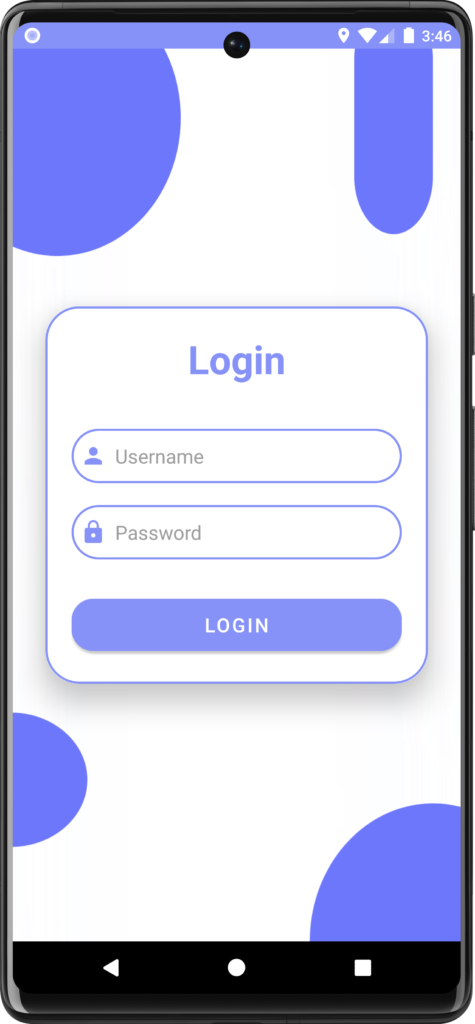
AK Bonus Points
- As it was a beginner-friendly project, we created a simple login page in the android studio without using any database.
- You can use Firebase or SQL as a database to store user details.
- You will require a signup or register page to let your user signup first and then login into your app.
If you have any queries or errors, please feel free to comment below 🙂
For detailed steps, watch our youtube video: Login Page in Android Studio using Java
Check our popular post here: How to Create Splash Screen in Android Studio